My new chaincase came from Hoopdriver Bicycles and made by Velo Orange. Not cheap but good quality.
Us North Americans tend to underestimate the lowly chainguard (and fenders for that matter) on the bicycle. I'm a firm believer in clean pants and figure it can't be all that hard to produce a good chainguard that's going to keep them clean. Instead we've now got plenty of "city bikes" on the market (commendable for sure) that still lack a good chainguard. For example, Linus and Public bikes are two popular city bikes being seen all over Toronto. They've got fenders, racks, upright handlebars and simple, rational gearing. Yet they still lack a proper chainguard. Instead all they do is protect pant legs for just a small part of the turn. If your pants can still get oily or get jammed in the gears why bother at all?
I had previously blogged about my first attempt at clean pants using auto loom to cover the chain. It wasn't a failure though it might require occasional replacement of the loom as you can see how mine cracked (though it still worked), or find more flexible loom.

I wasn't sure how it would stand up in winter so I decided to splurge for the chaincase.
The Velo Orange "Grand Cru Hand-Made Porteur Style Chaincase" is a fancy item. It is best meant for a fancy bike. But I don't care, I just want clean pants. (Velo Orange's chaincase is made for internal hub or single speed with a front chain ring of no more than 48 teeth.)
This chaincase is not easy to install. It requires drilling holes specific to your bike. Here are the parts that you get (with no manual):

I would recommend that most people just have Hoopdriver or another bike shop install the chaincase for you. Need I remind you again that a car costs, on average, $5000 a year to keep running with insurance, maintenance, gas and depreciation? I'm sure many of my readers can afford to pay a bike store to make your bike fit for all weather and clothes.
I was quite careful in measuring and drilling since I didn't really want to have to drill multiple holes. I held the chaincase against the bike and got an idea of where the bolt would be sitting. I marked the intersections of the holes in marker. I took the approach that I could get a general idea for the hole locations but that I would need to install each one separately and remeasure to get the exact location.
I then drilled the top hole near the seat tube. With fingers crossed I then screwed the thingamagig into the hole and then bolted the clamp onto the seat tube. Once that looked about right I measured the hole for the down tube. With both of these in place (but not completely tight), I held the back clamp over the chain stay and made the marks through the bolt holes in the clamp. I then drilled through the clamp and chaincase. Screwing one in I then drilled the second hole. This was tricky because I had to work from the back between the tubes, chain and wheel. It was good to keep the wheel on because it gave me an idea of where the chain ran and I wanted enough clearance.
Finally I had all the holes drilled, managed to screw in everything without losing the washers or nuts. I then had to do a lot of fiddling with the bolt adjustments to ensure nothing rubbed. It's great that Velo Orange allowed for a lot of variations in bikes. It can be tricky with some crank arms that are curved (as in my case) because it doesn't allow as much clearance.
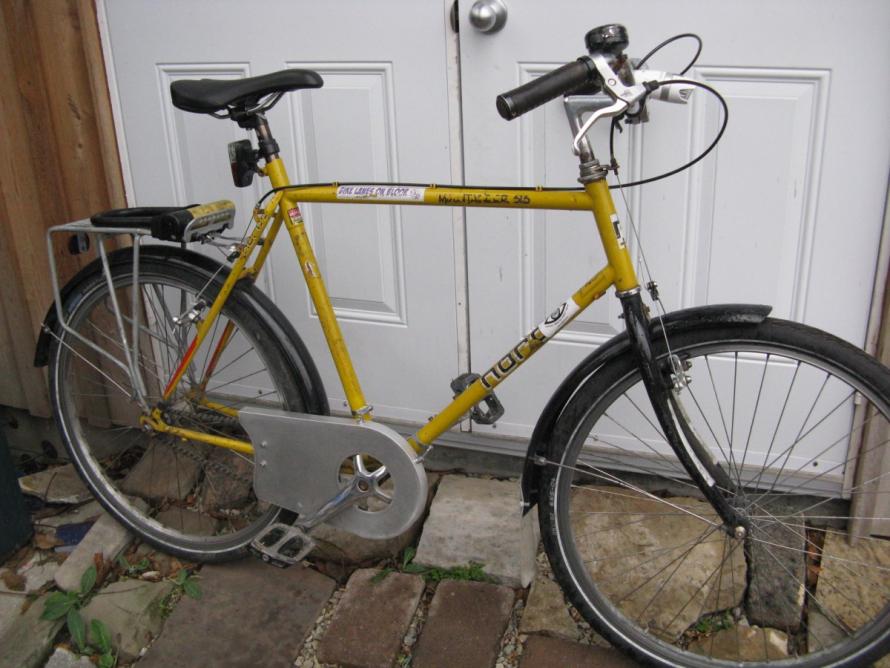
In the end I managed to get a chaincase that looked alright: