Oh, those zany people and their crazy inventions.
All the best in 2009!
Oh, those zany people and their crazy inventions.
All the best in 2009!
Look up. No I mean at ibikeTO's...ah...screwed up banner (as of December).
Ok, it could be an environmentally inclined -- it's green after all! -- Metalhead's idea of a fashion accessory. But it's even better: your ticket to remaining upright in slippery situations.
If you balk at the $100 Schwalbe and Nokian charge for their premium versions, are a do-it-yourselfer, and are keen on doing your part to save valuable resources -- that is, you're own green! -- do read on.
Studding your own tires is straightforward, and the result can easily exceed the performance of the high priced versions. You will need a few items before beginning though...
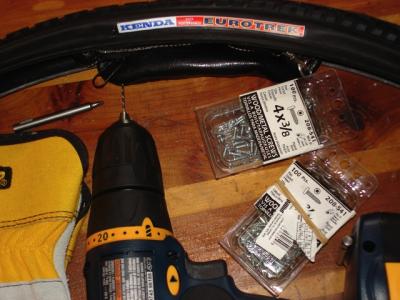
- Used Or New Tire With Sufficiently Deep Tread Pattern To Support Studs
- A Few Hundred Pan Head (4 X 3/8") Sheet Metal Screws ($3 Or $4/100 @ Pape/Danforth Home Hardware)
- 1/16" Inch Drill Bit
- "0" Robertson Driver Bit
- Electric Drill/Driver
- Lubricants, Libations And Tunes!
The time required varies with experience and quantity of studs. This tire, a 700 X 38 Kenda EUROTREK, ($25 at Cyclemania, Danforth/Broadview), with 200 studs -- it could've been 300 or 100, customization is encouraged! -- took 90 minutes; novices should count on at least 2 hours per hoop. You can do the job without an electric drill, using an awl and screwdriver, but don't, it's too tedious; beg or borrow an electric drill.
MTB tires, with their deeper treads, are better suited; those with 700c hoops should aim for thick casings and maximum thread depth to provide a supportive structure for the screws. The standard fastener for the job, 4 x 3/8 pan head screws, can be too long for tires with shallower treads, and though shorter 4 x 1/4" screws are available, I've not seen them packaged in bulk, only in sets of 10 -- at a premium price. (Mind you, I've been too lazy to seek beyond the local Home Hardware.)
Closely mounted fenders may have to be adjusted outward to allow clearance for the studs. Those with cyclocross, hybrids or 27"/700c wheeled beaters should beforehand ascertain whether there is adequate clearance at the usual tight spots (fork crown, chain stays, brake bridge).
Ok, now that the preliminaries are over, let's get studly!
[img_assist|nid=2771|title=Drilling guideholes in the Lugs|desc=|link=node|align=center|width=400|height=300]
1. After establishing the stud pattern drill (from the outside in) through the chosen lugs with the 1/16" bit. The holes will serve as guides when setting the studs which is accomplished in the reverse direction, from the inside out. It'll direct them through the center of the lugs where the extra materials serves to better secure the studs in the tire.
[img_assist|nid=2780|title=Setting the Studs|desc=|link=node|align=center|width=400|height=300]
2. Once the desired lugs have been drilled, turn the casing inside out, swap out the drill bit for the Robertson bit, and set the studs in the guide holes. Careful: the more studs you set, the more handling the tire feels like fistfuls of porcupine; a pair of work gloves may save you some skin.
[img_assist|nid=2776|title=Ready for the Mosh Pit|desc=|link=node|align=center|width=400|height=300]
3. Turn the tire right side out and voila! you're ready to hit Queen St. adorned in hip Heavy Metal Rubber -- and we all know know the rubber makes the rider!
Unlike commercial variants this example threads the studs from the inside out. Advantages of this configuration is that you'll not lose studs, common with the "externally" threaded counterparts, and replacements for worn ones are at the local hardware store for pennies; the disadvantage requires lining the tire to prevent the stud/screw head from abrading and possibly puncturing the tube. Use an old tube carcass here (filleted and wrapped about the tube to be inflated). "Tuffy" tire liners (available @ MEC), when wide enough to span the tract of stud heads, are ideal.
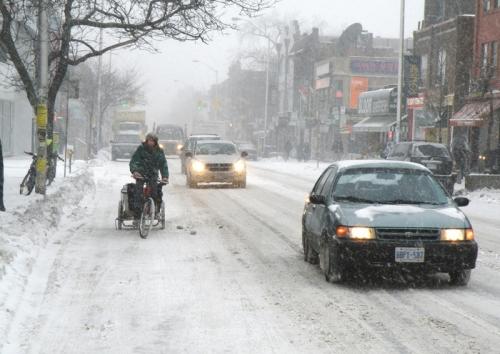
Typically, winter conditions serve up a melange of surfaces during a single ride: pack or powder snow, slush, ice and dry. Especially to those accustomed to road slicks, studded tires, especially homemade, feel like pigs on bare asphalt: noisy, heavy and sluggish. You'll get used to it; there's really not much to be done here although limiting the height (less than 1/8"), position and number of studs as well as inflation pressure helps.
[img_assist|nid=2774|title=It grates cheese too!|desc=|link=node|align=left|width=225|height=300]
Efficacy differs with surface type and ranges from negligible to fantastic over the studless variety. Deep semi-hard or -packed snow, typically on unplowed side streets and heavily trodden pedestrian ways, is a frigid PITA: it's neither a dense enough base to consistently support your weight nor yielding enough to afford contact with the road or ice underneath; it makes for exhausting zigzags. Predictably, where the studs really shine is on black/sheet ice.
As is often pointed out: if you've only one studded tire put it on the front wheel. You may also consider installing the tires on a second bike or wheel(set) that is pressed upon when inclination or necessity dictates. Toronto's main streets are often cleared in a timely fashion (if not its bike lanes or side streets), so the benefits of studded tires are often sporadic while the drawback, high rolling resistance, is constant.
Once you're suitably studified you'll be surprised at how reassuringly predictable is the bike's handling. Really. Traction is no longer an issue, and with that a major deterrent to winter cycling is removed. Unfortunately though, just as the perennial hazard, motorists, intensifies.
[img_assist|nid=2772|title=Don Valley Studs|desc=|link=node|align=right|width=225|height= 300]
Snow accumulation constrains the usually available space, so you'll be in much closer quarters with a lot of moving metal, the control and order of which is significantly diminished. Passholes, often on snow piled narrowed side streets, will have no qualm in brushing by you -- both ways -- with only inches to spare. Take care.
Several hundred studs at your disposal also offers intriguing possibilities -- no, staging an all Male Revue is not among them. For instance, those in the east end who've not explored the Rouge Valley wetlands, come February or so, why walk on water when you can ride on it? An afternoon pedal on the Rouge is just the occasion.
No cars, traffic lights nor potholes. Paradise. And no need to wait until summer to find it.
[img_assist|nid=2768|title=Wallace Dec 19|desc=|link=node|align=center|width=500|height=359]